自定义属性及加载
经历了一个快速入门的环节,相信你已经大致了解了一些的基础内容,接下来我们将体验一些比较枯燥的内容。
本片内容叫做自定义属性及加载,
前面我们用到一个application.properties的配置文件,包括数据库的一些信息,我们都是在这里面配置的。
我们在这个文件里面添加这样几行代码。(我用的依然是2-5实战里的moment_demo)
1 | #自定义属性 |
我们分别来看这几行。
第一行,cn.surine.moment可以随便写,我们叫做他prefix(前缀,注意不能写下划线,大写字母等特殊字符,会出现error)
name是属性名,后面的surine即属性的值
同理第二行,prefix + 属性名 。
第三行有所不同,不同之处,也就是属性值不同,${ xxx } 是一个占位,相信有编程基础的你可以理解,${cn.surine.moment.name}就是surine,而${cn.surine.moment.age}就是22,那other这个属性,值就是surine is 22。
所以我们来调用一下看看。
我们新建一个文件,这里可以没那么严格的包位置,我放在了Entities这个包里面。
1 | package cn.surine.moment.Entities; |
最后,我在Controller里面添加了如下内容
1 |
|
首先前两行,自动注入,很熟悉了,可以直接导入你要用的类。
下面的,也很熟悉,访问路径配置,然后方法体内部写返回的内容,是把我刚才定义的几个属性返回去了。

可以看到我访问对应路径已经出现效果了。说明我们的属性配置和访问没有问题
进一步探索
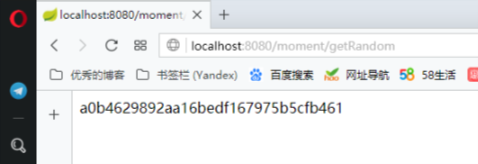
1 | (value = "/getRandom") |
我在Controller里面添加了这些内容,当然刚才我们已经注入了PeopleEntity,所以不需要再注入了。
可以看到我们调用了getString方法。
那么我们来看看,PeopleEntity里面加入了如下内容。
1 | ("${cn.surine.moment.string}") |
很正常,定义了属性和get/set方法,然后我们自然想到去看cn.surine.moment.string这个属性有什么不同。
1 | # 随机字符串 |
这个属性的作用是返回一串随机字符串,调用的方式是固定的,就写${random.value},场景也很常见,比如生成token啊之类的。
同样类似的属性还有
1 | # 随机int |
我们来看看效果。
继续探索
我们首先在pom中导入一个依赖,然后才能用接下来的方法来实现配置。
1 | <dependency> |
在属性文件中,添加:
1 | cn.surine.moment.webName=Su |
我们新定义了三个属性,name,email,page ,然后他们的prefix都是cn.surine.moment。
然后我在Entities里新建了一个WebConfig类,内容如下
1 | package cn.surine.moment.Entities; |
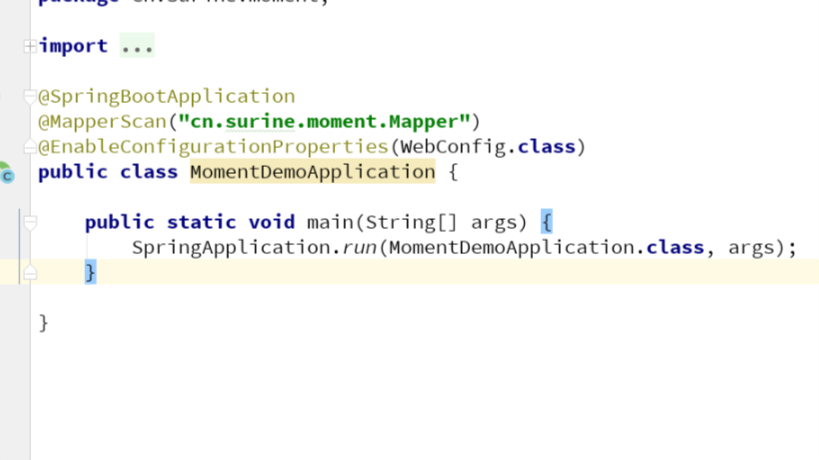
接下来,我们给MomentDemoApplication中添加一句
1 | (WebConfig.class) |
把对应的类配置进去
最后Controller里面的内容就写
1 |
|
照例注入。
返回WebConfig对象。
测试结果如下。

对于自定义属性及配置可以将属性抽离,而且对于正式开发,属性不同的情况下比较方便修改。后面会有不同属性文件的介绍。